Happy Halloween!! This year, we're challenged to develop more at-home activities to celebrate the spooky season, and this quick craft project is perfect for that! These painted glass jars are perfect because they're so easy! All you need is some craft paint, brushes, and a little imagination, and you're ready to create your own Halloween painted rocks, jars, and containers to make your home festive and fun this year.
This Halloween painted rocks and painted glass jars project is perfect for kids of all ages (with adult supervision), and it's fun for adults too! If you're a fan of Halloween and you're looking for a budget-friendly craft idea to get your home in the festive "spirit", look no further. Decorating these Halloween painted rocks and jars is a fun creative outlet and in many ways a way to relax and relieve stress when so much stresses us out these days. It's also a fantastic way to re-use empty jars and packaging to minimize waste! So to sum it up, this is a kid-friendly, budget-friendly, eco-friendly, and stress-relieving project that will fill your home with a festive Halloween mood!
What You'll Need
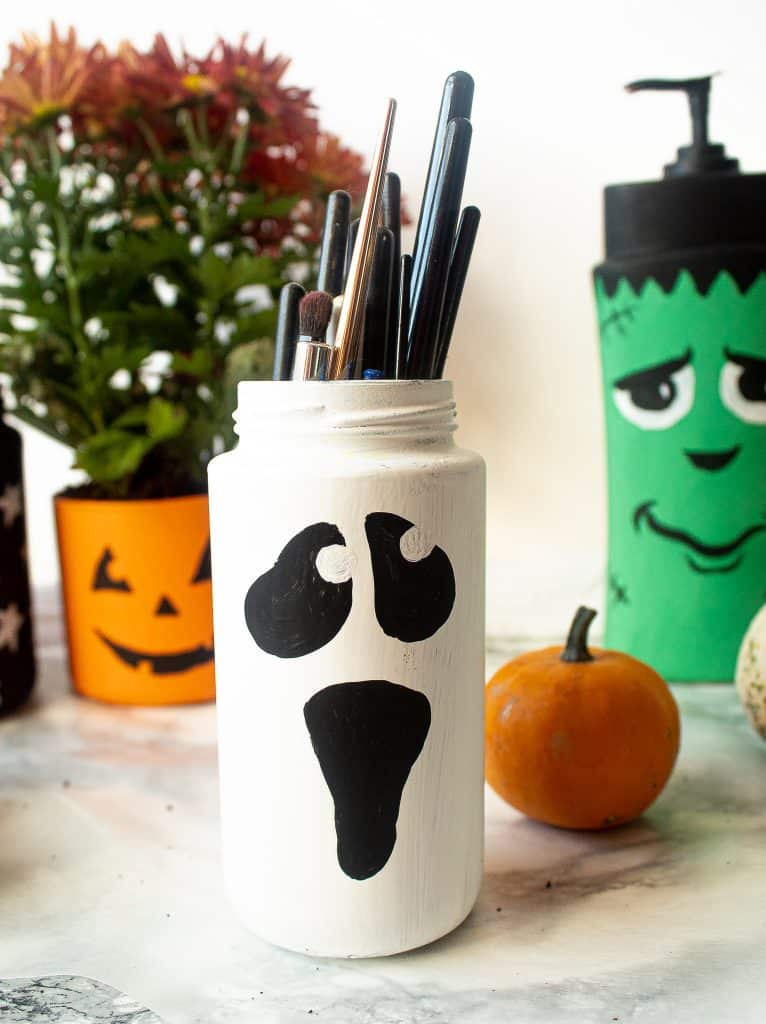
Most of what you'll need for these painted glass jars and Halloween painted rocks can be found around the house! Just look for empty glass or plastic jars in the kitchen, smooth rocks in the backyard, or even empty toiletry containers. You'll see in the images that one of my creations, my cute little Frankenstein's monster, was made from a lotion bottle! Your possibilities for these painted glass jars are endless -- other options include:
- jelly jars
- mayonnaise jars
- salsa jars
- flower pots/vases
- coffee canisters
- shampoo bottles
- empty candle jars
- empty multivitamin containers
- spice containers
- protein powder containers
Once you've got your household items, you'll need to grab a few paint supplies for these painted glass jars. I picked up some paintbrushes and craft paint sponges, as well as a few bottles of craft paint for just a few dollars at my local Target. You can find similar items at any discount store or even a drug store that has a school supply/art supply section! Here's everything you'll need:
- household jars, empty containers, or gathered rocks, clean and dry
- newspaper, plastic sheeting, or a plastic garbage bag - to protect your work surface
- paintbrushes and foam brushes - these can be simple brushes from any local discount or craft store. I used a couple foam brushes to cover the whole surface, and then used smaller pointed brushes to paint on details.
- craft paint - I used Ceramcoat acrylic paint in black, white, green, and orange. You could also use purple, brown, or their metallic and glittery colors too!

Step-by-Step
- Make your your jars, containers, rocks, and anything else you plan to decorate is clean and dry -- this is especially true for items that once contained food or household items.
- Spread out newspaper, tarp, or plastic garbage bag on your work surface.
- Set out your paint -- you may want to use a paper towel, paper plate, or another disposable container to mix your paints, if necessary.
- Decide on your design -- search online for inspiration, and sketch out ideas before you start painting. What will the characters eyes look like? If you're painting text, how should it be spaced out?
- Once you've planned out your design, use a foam brush to paint one coat of your base paint color on your rock, container, or jar. set it on the newspaper and allow to dry fully. Wash and dry your foam brush immediately after each use. Paint a second layer of base paint and allow that to dry too.
- Paint on your detailed decorations using smaller, pointed paintbrushes. Be creative and have fun! Allow your painted Halloween creations to dry fully.
How to Use your Decorated Creations
This is the best part -- displaying and using your painted glass jars and Halloween painted rocks! Here are a few ideas for how to use your creations:
- plant pots
- pencil holders
- miscellaneous storage (keep the lids)
- Halloween candy dish
- Halloween gifts for friends and family
- candle holders/luminaries
- paperweights
- decorative accents for a coffee table or entryway
- cookie jars
- outdoor decorations
- pet treat holder
And I'm sure there are so many other ways to use these fun Halloween painted rocks and painted glass jars! Let me know how you used them down in the comments!
Halloween Recipes to Try
Round out your spooky celebration with my Halloween Candy Bark with Oreo Cookies, my Halloween Chocolate Covered Strawberries, or my Halloween Dirt Cups with Chocolate Cheesecake Filling! Chocolate lovers will flip for my Cookie Monster Cookies and my Graveyard Brownies!

Equipment you may need:
- foam brushes
- paintbrushes
- newspaper
- plastic tarp
Ingredients:
- glass jars, smooth rocks, kitchen containers, toiletry containers, and glass candle containers empty
- acrylic craft paint purple, orange, black, white, and green
Instructions:
- Lay out newspaper or plastic tarp. Clean and dry all jars, rocks, and containers.
- Using foam brush, paint base coat of paint onto the whole outside of each item. Clean brush immediately. Allow paint to dry fully.
- Repeat step two, allowing paint to fully dry again.
- Paint on design (jack-o'-lantern, ghost face, "trick or treat" text) using small, pointed paintbrushes.
- Allow design to dry, and display your Halloween creations!
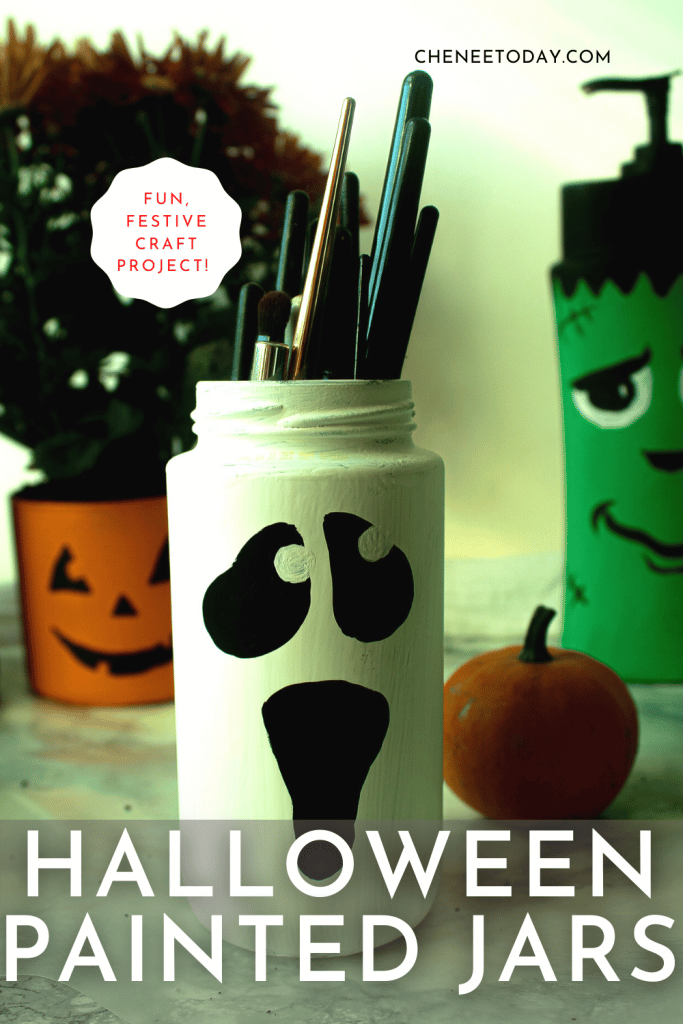
PIN this Halloween craft project for later!
Last Updated on April 8, 2024 by Chenée Lewis